Sunday, June 14, 2009

back with cake.

Dear me,

I'm sorry I made you wait so long for the next post. In the meantime I've been discovering farmer's markets, eating kale, quinoa and beets. Three foods I'd never thought I'd eat in my life, let alone like.

But the sweets always figure in my life somehow. I was determined to make myself a birthday cake this year, an ambition I've always had but rarely follow through on. I usually bake cakes for friends on their birthdays, but when it comes to my own I just want to sit back and do nothing. Or cross my arms over my chest and pout, wondering why none of my friends take it upon themselves to bake me a cake. But I know, I know that I would prefer to eat my own cake. I think I'm habituated (is that a word) to my own baking just as I am to my own scent. I don't know the scent is there, though I'm sure it is, and therefore it sits just fine on me. In fact I'd say it suits me well. And so does my baking. I know what's going into my dessert, (i.e. I know how much butter, how little salt, etc) and somehow that makes me sure that I'll like it.

So for the big 3-0 I thought I'd bake a classic genoise from this cookbook. I added orange rind and lots of vanilla bean paste to make for an extra tasty sponge-like cake. I pictured it layered with a rich chocolate (homemade) buttercream frosting. But I wouldn't settle for anything less than perfect and when the two cakes came out of the oven but would not release from the non-stick pans that I had buttered, I knew I was in trouble. I managed to get one out OK, but the other one clung to the pan in odd patches leaving huge chunks in the cake when I finally got it out onto the rack. On top of that, I noticed the occasional speck of flour that hadn't mixed in to the batter properly. With two days before my birthday I sighed, called it a night and decided to make a new cake the following day.

Attempt number two was to produce a two layer chocolate chiffon cake from this book. The cake was one I had made 5 months earlier for a friend--with terrific results. While it looked picture perfect when removed from the oven, the taste wasn't well, chocolatey. I don't know what went wrong--could it have been the Sunny Select canola oil from Lucky's that I'd used? Or the year(s?) old Hershey's cocoa that had been sitting in my cupboard? I started beating myself up for not having refrigerated the cocoa, and immediately suspecting that as the reason behind why my cake tasted wrong. The 6 eggs that I used--no, make that 12 since I messed up the first crack around by spilling egg yolk into the whites--to make the orange buttercream frosting were well worth my time. The italian meringue-style buttercream was a hit. But the cake, cute and all as it looked, was kind of a bust.

But what of that genoise I'd snubbed the day before? I froze it, only to dig into it a couple of weeks later and promptly eat 1/3 of one layer straight out of the freezer. I kid not. And, it was delicious. Flour clumps and all. The remaining cake and 2/3 were put to use this weekend with a little help from semisweet chocolate chips and my roommate's confetti frosting a la Betty Crocker. I'm not sure how I feel about BC, but the cake, layered with apricot jam (a little grand marnier as well) turned out to be delicious. I shouldn't have doubted in the first place. But that was back when I was 29, not nearly as wise as I am now at 30.


The canola oil chocolate cake, disguised in delicious orange buttercream.


The not-so-dolled up genoise. Looks can deceive... this was a much tastier cake.

Monday, February 2, 2009

Butternut Squash Soup


What have I to complain about, weather-wise? I'm lucky enough to live in California, where the temperatures have been up and down but reaching 65 degrees on the odd January day. But San Francisco can also be very cold, as I've mentioned over and over. It's the humidity, I think. Cloudy, cold days scream soup to me. As in, I should eat some.


I've never been a huge soup fan. It somehow doesn't seem as satisfying as a sandwich. "Liquid lunches" have never held the number one spot in my lunchtime repertoire because I tend to feel hungry only an hour or two after eating soup. But soup is good for you. This winter I've trained myself to slurp it and feel satisfied. By adding a slice of bread--maybe a tiny bit of butter--the meal feels rounded out. (Have I been living under a rock? you're thinking. Cause I'm pretty sure cafes have been serving soup with bread forever.) Just let me enjoy my naivete, and you enjoy the recipe I have to offer for a delicious butternut squash soup.


Butternut Squash Soup

adapted from Eating Well magazine


1 medium butternut squash, halved, seeded, and roasted (350 degree oven for 45 minutes to an hour. The longer it cooks and more caramelized the squash, the better flavor your soup will have.)

1 tbsp olive oil

2 stalks celery, diced

2 carrots, chopped

1 sweet onion, diced

4 cups chicken broth (low sodium)

2 cups water

2 tsp cumin

1 dash ground cloves

1 dash cayenne

1/2 serrano pepper (de-seeded if you want less heat in your soup)

salt and pepper to taste


Allow the roasted squash to cool. Meanwhile, in a large pot pour in olive oil and add onions. Allow to soften for 1 minute. Add celery and carrot and cook over medium low heat for 8 to 10 minutes, until the vegetables begin to soften. Scoop squash flesh out into pot. Add chicken broth and water, and spices (except for salt and pepper). Bring soup to a gentle simmer and let cook for 20-25 minutes. The water level should be reduced by about 1/4, then remove soup from heat. Using an immersion blender, puree soup to desired consistency. Enjoy warm, with some hearty wheat bread.

Thursday, September 11, 2008

a tribute to friendship


And now I digress! Last weekend I had the pleasure of seeing a long gone friend, Ms. Tiffany Bartz, and her partner in doing crazy things (not crime, exactly), Shane Bussmann. One Brandi Howell accompanied me on the journey, where we encountered the full Bussmann/Bartz and extended family clan (i.e. Nelson) and enjoyed a day of heat, Mexican food, libraries, and Old Maid! It was a really great day. In honor of that, I would like to share the photos of friendship!
Have a great weekend.


The Bartz-Nelson's:


Grin and Bare It: A Tale of 20-somethings post-orthodonture:

An Elf on the Loose:

Duck Fat Fries

So much has been eaten (by me) in the past month or more that I hardly know where to start. For one, I was obsessed with the October 2008 issue of Eating Well and kept repeating the pineapple coffeecake (with nectarines instead of pineapple) because it was at once so "healthy" and delicious. Ok, it wasn't fat-free or anything, but it had a hearty cup or more of whole wheat flour, adding some much needed fiber to my diet. (ha ha, or not!) All in all, it was delicious. I made a teryaki chicken dish from the same issue, also delicious. And I have been wanting to make a turkey meatloaf from said issue, that uses bulgur as a fibrous filler. I shelled out the big bucks for the bulgur, but still haven't gotten around to making the meatloaf. Turkey meat sauce and spaghetti is just way too easy for me to make, and prevents me from getting round to the meatloaf.

Also, I was weighed down with some stomach troubles for awhile, and was trying to eat only bland foods. That wasn't so much fun. When I started feeling better for maybe a day, my boyfriend decided that it was time to try making double fried french fries (fried in duck fat a la Vegas, baby) AT HOME! Thankfully, this is San Francisco, and finding duck fat was as easy as typing "google.com" in the url. I can always count on the Chow threads. While the duck fat didn't leave a poultry-ish taste, the fries were crispy, golden, and looked super professional. Good job, Joe! The tasty shoestrings called for meaty steaks, which I topped with a wine/broth/shallot/basalmic/mustard reduction which was sweet, acidic and heavenly. All this, and a bottle of 2 buck Chuck called for nothing less than a flourless chocolate cake for dessert. It was a real bistro meal. So good. Of course, it wasn't the best meal for a rebounding stomach, but it certainly dazzled my tastebuds.

And so I leave you with a few pictures...


Start off by peeling and chopping your potato into desired width:


Next, place shoestrings in big vat of hot oil, or melted duck fat:

Then drain on paper towel (and prepare for 2nd fying---not shown here, unfortunately. I can vouch for the fact that the end result produces a deep golden, crispy fry.)

Finish it all off with chocolate cake for dessert!

Sunday, August 3, 2008

Tomato Tarte Tatin

A friend's lunch visit yesterday (Saturday last) inspired me to make something from Chocolate & Zucchini, (the cookbook derived from the eponymous blog,) which my old roommate gave to me for my birthday. I enjoy the blog and was taken with the book, which is a surprisingly rich compendium (for a blog-turned-book) with color pictures of many of the recipes. Since it's summer, the idea of slightly caramelized, oven roasted tomatoes was very appealing. I've made a traditional tarte tatin before--basically an upside down apple tart--and liked the idea of turning it into a savory lunch dish.

The recipe turned out great, and the tart looked just as it did in Clotilde's book. I modified her recipe slightly (of course!) and in the future I would add even more tomatoes, because, well, why not?

Tomato Tarte Tatin
(adapted from Chocolate & Zucchini, Broadway Books, 2007)
pate brisee (recipe to follow):
1 c. bleached flour
1/3 c. cake flour
1 stick (8 tbsp) unsalted butter, chilled and diced
large pinch of salt
1 egg, lightly beaten
ice water

tart filling:
1-2 tbsp olive oil
1 tbsp granulated sugar
2 lbs Roma tomatoes (about 8 tomatoes), washed, seeded and sliced in rounds 1/2" thick (or thicker, depending on your preference
2-3 oz goat cheese
1/2 c. fresh basil, washed and dried
salt
pepper
spices: thyme, dried basil, rosemary--whatever you have on hand will work.

Begin by working on the pate brisee, as this will need to chill in the fridge before tart dough can be rolled out. Using a food processor, combine flours, salt and butter. Pulse until mixture resembles coarse crumbs. Then add egg and pulse until mixture starts to come together in a ball. If this doesn't happen within a minute or so, add a teaspoon of ice water to the mix. Add a teaspoon at a time until the dough starts to form a ball. At that point, remove dough from the food processor and shape into a ball. Flatten slightly, then cover tightly in plastic wrap and leave in the fridge for at least 30 minutes, and let dough sit outside of fridge for at least 10 minutes before rolling out.

While dough is in fridge, work on the tomatoes. Preheat oven to 350 degrees. Coat a 9" pie pan with a tablespoon or two of olive oil. Sprinkle on a teaspoon of a sugar. Then arrange your tomato slices in the pan in a circular formation, layering slices if necessary. Try to squeeze in as much tomato as possible on the bottom of the pan. Season with salt, pepper and additional spices, and a little more olive oil. Bake for 30-40 minutes, until soft. Remove pan from oven.
When tomatoes have cooled, sprinkle on the goat cheese.

Sprinkle your work surface with a little flour. Roll dough out into a circle about 11" in diameter, or even larger if you prefer a thinner crust (which you can then chop down). Prick the dough with a fork (to help prevent it from puffing up while cooking). When the tart pan has cooled off, cover the tart with the crust. Chop off unnecessary borders, leaving an extra 1/4" around the edge of the pan. Then, tuck this extra crust into the pie pan; this will help form a nice crust. Bake for 30-40 minutes, until crust turns a nice golden brown cover. Let tart cool on a rack before flipping it over. I tend to use the tart-to-plate method, placing a plate face down over the crust, then flipping the pie over with the plate simultaneously. Spoon up the remaining juices from the pan and pour over tart. Sprinkle with fresh basil. Best served still slightly warm, with a side of salad and a slice of bread. Bon appetit!

Friday, August 1, 2008

Blueberry Tart


Summer is here, but the only way I notice it is from the appearance of "classic" summer fruits in the markets. Not to get too down about the weather here, but SF is not known for its warm, languid summers. Instead, we get wind, fog, mist (imagine the combination of all three at once), and occasionally a sunny day. (Today happens to be one of those, hooray!)

It's a good thing that the farmers in the North Bay area and Central California get lots of summer sun, providing juicy and ripe fruit to this windy city. Nectarines, peaches, apricots, plums, cherries, blueberries--I like just knowing that they're readily available for purchase.

I love blueberries the most, especially when ripe, plump, and sweet. For what I imagine will be a limited time only, the big chain groceries seem to have an abundance of the bluebs. 22 ounces on sale for $4! That's an amazing deal, considering that throughout the year imported berries cost about $4-5 per half pint. I can eat through that in one day.

But with my surplus of cheap berries, I actually have a hard time eating all of them in a week. This, in spite of my throwing about 1 cup and a half of berries into my cereal each morning. And I have been buying more berries before running out of the old batch, for fear that the following week's shipment won't be on sale. (And I'm not going to buy the same clamshell I'm currently getting at $4, for $8, when the price goes back up.) As a result, I'm always thinking about what I can bake with the excess blueberries. A week or so ago I made a delicious lemon blueberry coffeecake with pecan crumble topping (thanks to Cooks Illustrated), and the blueberry tart shown above. I cobbled the tart together from several recipes, baking the crust from the tarta de naranjas recipe that I made back in February, and topping it with cooked vanilla pastry cream and fresh blueberries. The three layers come together nicely in spite of their differences: buttery pastry crust with creamy topping and crunchy berries whose juice is released in the mouth. I can assure you, the combination is quite good.

Blueberry Tart
1 prebaked tart pastry (adapted from The New Spanish Table)
1 pastry cream recipe
1-2 cups fresh blueberries (washed & dried)
prebaked tart pastry shell:
1 1/2 c all purpose flour
2/3 c confectioner's sugar
1 pinch salt
10 tbsp unsalted butter, chilled and cut into cubes
1 large egg yolk beaten with 2 tbsp chilled heavy whipping cream
1 tbsp ice water, if needed

Place flour, sugar, and salt in food processor and pulse 5 or 6 times til mixture is combined. Add the butter and pulse until mixture looks like coarse crumbs. Remove mixture to a bowl and stir in the egg yolk mixture with a fork until evenly distributed. If the dough has started to stick together, shape it into a ball and flatten slightly. Cover tightly in plastic and refrigerate for at least 1 hour, or up to 1 day. When ready to use dough, remove and let sit out on the counter for about 10 minutes. On a lightly floured surface, roll out the dough into an 11 inch circle. Transfer the dough to a 9 inch tart pan with a removable bottom, pressing it into the sides of pan. Trim any excess dough that hangs over. Prick bottom of dough all over with a fork. Freeze dough for about 20 minutes, and meanwhile preheat the oven to 400 degrees.

Remove from freezer and cover tart shell with aluminum foil, then add pie weights (or something heavy to keep dough from puffing up while baking) and and bake crust for 25 minutes. Remove pie weights and foil and keep baking for another 8-10 minutes. Cool tart shell in pan on a baking rack completely before filling.

While tart shell is in the oven, prepare pastry cream:
1 c milk
3 egg yolks
1/4 c sugar
1 1/2-2 tbsp cornstarch
1 tsp vanilla extract

Whisk 1/4 cup cold milk, egg yolks, sugar, and flour together. Gradually add remaining milk (warmed, then mixed with cornstarch) and stir until smooth. Heat in double boiler, beating until cream becomes thick, stirring constantly to prevent burning. When thickened, remove from stove and transfer cream to a bowl to let cool. Stir in vanilla extract. Place bowl in a shallow pan of cold water to help cool, and stir cream mixture from time to time to prevent skin forming on top of cream. When mixture is room temperature, use it to fill tart shell. Or, cover with plastic wrap and place in refrigerator for up to 8 hours.

Once tart shell has been filled with pastry cream, smooth it out with a spoon or spatula. Then add blueberries, and voila, the tart is ready to eat.

Thursday, July 24, 2008

what's new.

Some of you may well be wondering "Just what is going on in Jessica's food life? Her absence is driving me mad, knowing that she's cooking up something delicious and refusing to share it (visually) with the rest of us. She's so selfish." Ha ha, I'm sure that evil thought has never crossed your innocent minds. Instead you may have chalked up my blog-absence to laziness. Now that's more like it!

To brief you all on what I've been up to, I have a quick pictoral collection of a few goodies I made over the past month or two. Or three. Listen! I came back from Europe bummed out in general to be back, so please! I'm finally coming out of the mourning period.

Vanilla applesauce cupcakes with strawberry frosting:


1 vanilla cake mix (from a box!)

I followed the recipe for the lowfat version of these cupcakes, which involved "no sugar added" applesauce in place of butter. The result: I couldn't tell the difference than if I had used butter. As long as you're using a chemical mix, might as well through in some fruit and kick up the vitamin quotient, right? The frosting was a concoction purely my own. Take a stick (or two) of (very) softened butter, add a tablespoon or two of vanilla extract, and 2-3 cups of powdered sugar. Stir together til ingredients form a smooth frosting-like substance. For the true strawberry flavor I poured half a cup of frozen strawberries into a blender, pulsing until they formed a puree. Then I add about a third of this mix to the frosting, stirring completely until well-mixed. This made for true strawberryliciousness. Believe me, you'll impress everybody with the intense flavor in this homemade frosting. And then for the big reveal before your crowd: there are two fruit involved in the making of this cupcake!

Oh, and well, I lied about the pictoral collection I was going to show you. I'll have to save the next few for upcoming blog posts. It'll give me a reason to keep on.

Wednesday, April 23, 2008

Baked samosas


A few nights ago I was sitting around, perusing my roommate's Cooking with All Things Trader Joe's cookbook and came upon this interesting recipe for Indian-style baked samosas. While I wasn't sure about the book--a lot of the "recipes" seem to involve emptying the contents of one TJ's item, like hummus, onto a plate and serving with TJ's organic baby carrots--this recipe caught my eye. It's essentially a rip-off of the Moosewood cookbook's vegetarian samosa recipe, but they've adapted it to involve those pre-washed/peeled/cut sweet potatoes and frozen TJ peas. I was inspired by the simple crust recipe, involving nothing more than flour and buttermilk, and adapted the already-adapted recipe into my own version. I made samosas with the sweet potato/pea filling and a second version of my own creation, a sort of curried ground turkey meat filling with onions and raisins. This raisins balance the spice and saltiness of the curried meat perfectly. Once you make the crust, whose buttermilk lends a gentle tang to the dough, you are free to create just about any filling you wish. Both of these are winners though, in case you're tempted to try them!

Baked Samosas, adapted from Cooking with All Things Trader Joe's, by Deana Gunn and Wona Miniati, Brown Bag Publishers, 2007.

Buttermilk crust
2 1/2 c white flour
1 c buttermilk (or plain yogurt--not fat-free)
1/2 tsp salt

Sweet potato filling
1 large sweet potato, or 2 smaller ones
1/2 c frozen peas
dash of coriander (dried)
dash of cumin
fresh chopped cilantro (can omit if unavailable)

Curried ground turkey filling
1/2 cup raw ground turkey
1/4 c minced onion
2 tbsp raisins
pinch salt
1 tbsp curry powder
*pepper, coriander, cumin should be added to taste
oil

To make the crust:
Mix flour and salt in a medium bowl and then create a well in the middle. Pour in buttermilk and stir the mixture until the dough forms a ball. Add a little flour if dough is too sticky, but remember that dough should be soft. Cover with plastic and set aside in fridge for 30 minutes to an hour while preparing the filling(s).

To prepare the sweet potato filling:
Wash sweet potatoes and place in a pyrex or microwave-safe dish. Use a knife to make cuts in the raw potatoes. Then cover the dish tightly with plastic wrap. Place in microwave and cook on high. This may take from 6 to 11 minutes. When cooked/soft throughout, remove sweet potato, and peel when cool enough to handle. In a small bowl, mash the cooked sweet potato with a fork, and stir in the frozen peas and spices. Set aside--in fridge if samosa assembly will be further delayed.

To prepare turkey filling:
Heat a tablespoon of cooking oil in a frying pan on the stove. Add minced onion and let cook for a minute over medium heat. Add turkey meat and break up with spatula to avoid large clumps of meat from forming. Once meat loses its pinkish hue throughout, add curry powder and additional spices. Once mixture is thoroughly combined, add raisins. Remove from heat and let cool.

To assemble and bake the samosas:
Preheat oven to 400 degrees.
Remove dough from fridge. Break the dough evenly into about 10 small balls. Roll (or flatten with your hands) each one out to be about 6 inches in diameter. Smaller balls will work too; the dough will just be thicker and you can fit less filling in each one. Place about a heaping tablespoon of your filling of choice into each samosa. Fold the dough over the filling to create mini crescents, and press the edges of the dough firmly together to close off. Place samosas on a greased or floured baking sheet and bake for 20-25 minutes, until slightly golden brown. Remove from oven and let cool 5-10 minutes before serving. Best served with mango chutney!
*Note on the cookbook: Bizarrely, the authors of this Trader Joe's book have nothing to do with the company, and merely set out to create as many recipes as they could with the products that Trader Joe's carries. A nice idea, (think "stuff white people like") but one problem with trying to follow all the recipes is the lack of consistency in TJ's store-to-store stock. The authors have a nice-looking recipe for Green Garbanzo Salad, but I was only able to purchase frozen green garbanzos at TJ's for one week at the Geary/Masonic San Francisco location in 2007. They were great, but unfortunately, one bag was all I got. This book could just as easily be called "easy weeknight dinners;" you can buy the same products at a different grocer and probably get the same results from the recipes.

Tuesday, April 22, 2008

Faux Coussins de Lyon


I am a glutton, a gourmande, a golosa. In any language, the fact is, I love sweets and will not pass up an opportunity to eat sugar spun into a fancy confection. When I traveled with my parents to Lyon in 2002 or 2003, we discovered the city's historical sweet: the coussin de Lyon (or pillow of Lyon). This marvelous treat does look like a miniature pillow fit for royalty. The center is a rich ganache with a splash of curaçao or other liqueur (the recipe for the coussin is under lock and key, and noone except the confectionery who produces it know the exact recipe. There are coussin knock-offs as well, and I don't think their recipes are well-known either.). The ganache is surrounded by a layer of almond paste that is finely candied on the top. The pillow is distinguished with its pale aqua-green color and a fine stripe of darker green running down the length. It's an intense bite. It'll cost you, too. I figure that with the dollar so low right now, I'll end up paying more than three dollars per square inch coussin (when I go to France and hunt down a bag of these later in May). But those are the lengths I like to go to for sweets.

According to Wikipedia (and my loose translation), in 1643, the mayors of Lyon decided to plead to the Virgin Mary to spare the town from the plague epidemic. In so doing, they lit a 7 pound wax candle and put a gold piece on a silk pillow (is it just me, or does something here not make sense?). Jump forward over 300 years to 1960, where the Lyonnais chocolatier Voisin decided to make a candy in the shape of very same pillow. Well, that's one theory, anyway.

The exterior is hard, with its crystallized sugar coating. Take a bite and the candy softens into ganache, with the flavors of almond, orange, and chocolate coming through.

I ran out of my last bag of these candies shortly following a trip to Nice in 2006, where I've actually found some of the best coussins de Lyon. It's been over two years, and with the European trip looming, I'm looking forward to more of them, at any cost, as I mentioned. But there's a blip in my waiting period for coussins. Last weekend I went to the Fillmore Street's Patisserie Delanghe, a French bakery that is less well-known than the neighboring French rival/giant Bay Bread/Boulangerie. (The pastries looked less glamorous at Delanghe, the croissants forming a less-than-perfect crescent, providing less reason to spend $2.75 for just one.) But then I turned to the second pastry case where the fancy cakes and pastry puffs with hardened caramel sit. Underneath those I saw a platter of the little chocolate logs, one of which is pictured above. As far as I know, these have no official name. The cashier called them marzipans, which they are. But they're more, and they're perhaps the closest thing I've tasted to a coussin lyonnais.

One of these rouleaux (rolls, as I've taken to calling them) was not enough for me, so I went back the next day for another. This time, M Delanghe was working alone. He didn't notice me when I entered the shop, and was in fact reading a magazine. Lazy Sunday! I took a minute to admire the French authenticity of it all--the patissier relaxing, paying no notice to a customer. Who am I to trouble him, after all? Finally, he took his notice of me and walked over to greet me with a pleasant smile.

"Could I get two of those--those rouleaux?" I stammered, eager to impress with my French accent.

He gazed over the countertop at the other pastry case to see what I was talking about, but I was met only with his blank stare.

"Those rouleaux, the little logs." Silence. "The marzipan." I finally said, remembering the cashier's name for them. "They remind me of the coussins de Lyon," I went on, trying to get something out of him, a sign of recognition, or acknowledgment that I was in on the secret--he was creating his own version of the coussins. How many people know about the coussins outside of France? I thought. I've even met French people who don't know what they are. I was futilely looking for a connection to this French baker.

"Ah, they remind you of the coussins de Lyon," he repeated with a playful smile, and pulled two of the freshest looking marzipans off the plate and put them into a pastry bag for me.

"Three-Ninety." He asked for the cash.

That's $1.95 each, much less than the actual coussin will cost me in France, and twice its size. I didn't figure out what the patissier meant that day, if he knew what the coussins are (I am fairly certain that he did, if he's an expert in his craft) or if he thought I was trying to say something in French but had no clue. "She thinks my candy tastes like the pillows in Lyon?! Stupid girl!" Perhaps he thought the less of me. But I don't care. I'll go back again for these--probably a couple of times--before my trip to France.


Actual coussins de Lyon in a fancy "pillow" case.

Wednesday, April 9, 2008

Crab Cakes

Good evening friends! I regret to inform you that I forgot to take a picture of this evening's crab cakes. Let that be a testament to their mouth-watering, pan-fried and crispy golden glow coming off the pan. They offered no choice but to be eaten immediately. In lieu of a picture, I have a recipe. I began by following a recipe from this month's Olive magazine (a BBC publication), throwing in my own touches and changing the recipe along the way. You can pretty much get away with whatever you want where crab cakes are concerned. Use fresh chopped onion if you have it, or dried, and throw in dried or fresh herbs as desired.

Crab Cakes for Two
2 tins crab meat (120 grams each)
1 heaping tbsp mayonnaise
1 tsp dijon mustard
1/2 egg, beaten
1 tsp sweet smoky paprika
1 dash dried onion pieces
1/2-3/4 c bread crumbs (I used matzoh meal)
pepper
cayenne
1 lemon, cut into wedges

Drain crab meat, then add to a bowl along with all the ingredients and mix thoroughly with spoon or hands. Make sure mixture clings together in one large clump. Then divide into 6 individual "cakes." Place cakes onto a plate or baking sheet and press down slightly to flatten. Refrigerate for at least 20 minutes to firm.

Heat olive oil in a large cast iron skillet (or frying pan). When hot, add crab cakes and cook over medium high heat, adjusting if cakes seem to brown too quickly on the bottom. (Add more oil upon flipping cakes; this will help prevent them from sticking to pan.) Cook for 3-4 minutes on each side. Remove from stove and serve warm, with a squeeze of fresh lemon juice.

Suggested accompaniment: Baked sweet potatoes.

Tuesday, April 8, 2008

Angel Food Cake


Last weekend I couldn't stop thinking about lemons. I decided to just go all out and use a bag of lemons for dessert. I opted for a fat-free angel food cake with lemon rind. Fourteen whipped egg whites later, I didn't have the heart to throw out the isolated egg yolks. Thus, the lemon curd. I guess the dessert balances itself out--I removed the fat from the cake, only to pair it with some of the delicious egg and butter-rich lemon curd. I have no regrets, however. Here's to delicious springtime baking!

Lemon Angel Food Cake
adapted from Lori Longbotham's Luscious Lemon Desserts, Chronicle Books, 2001.
1 c sifted cake flour
3/4 c confectioner's sugar
14 large egg whites (at room temp)
1 1/2 tsp cream of tartar
pinch salt
3/4 c granulated sugar
1 tbsp vanilla extract
2 tbsp lemon zest (from 2 lemons)

Preheat oven to 375 degrees. Line a 10" tube pan (or leave ungreased). Sift flour and confectioner's sugar together in medium bowl. In a separate large metal bowl, beat the egg whites with an electric mixer at medium speed until foamy. Increase speed to medium-high, add cream of tartar and salt, and beat just until the egg whites form soft peaks. Add the granulated sugar, about 1 tbsp at a time, beating well after each addition, and beat just until the whites form stiff peaks. Add vanilla and lemon zest and beat until just combined.

Sift one quarter of flour mixture over the egg whites and fold in with a spatula. Continue gently folding, one quarter at a time, until all the flour mixture has been added. (Work slowly, carefully to mix in all flour--but don't overmix.) Spoon batter into the pan and use a knife to cut through the batter, removing air pockets. Smooth top with a spatula. Bake for 35-40 minutes, or until golden and cake pulls away from sides of pan. Allow to cool on wire rack until room temperature, then flip onto serving platter.

Make a lemon glaze and or curd to serve with cake.

Lemon glaze:
1 c confectioner's sugar
2 tbsp fresh lemon juice
2 tsp grated lemon zest
Whisk ingredients together in small bowl and pour glaze over cake.


Lemon curd:
1 c (2 sticks) unsalted butter
12 egg yolks
1 1/2 c granulated sugar
1 c fresh lemon juice
1/4 c lemon zest
pinch salt

Melt butter in microwave or saucepan over medium heat. Remove from pan when melted and add sugar, lemon juice, zest and salt. Whisk until well-mixed. Add in yolks and mix until smooth. Cook the mixture, whisking constantly, until it thickens over medium-low heat (this can take up to 10 or 15 minutes). Don't let it come to a boil. Once thickened, remove from heat and let cool until it's at room temperature. Refrigerate up to one month.

Monday, March 31, 2008

Peanut Butter Cookies


I should really title this entry "the hidden danger of peanut butter cookies." What danger? What harm in a bite of peanut butterlicious chunkity goodness, a soft-as-cotton-candy cookie that goes in the mouth and down the pipe without any struggle at all? That's it, right there! I write in a state of pb cookie shock syndrome. There are no symptoms, really, that's what makes it hard to identify, and therefore, better to take preventative measures to avoid. I've eaten two peanut butter cookies and feel no side effects, my body producing no headache, feeling of satiety or other signal to keep me from polishing off two more. Beware, friends, readers of the danger in the peanut butter cookie. I warn you not to attempt the recipe below. Do NOT make these at home. The peanut butter will go straight to your thighs/hips/stomach/(insert "culprit" body part here) and your brain and tastebuds will sense nothing but pleasure.

Muhahaha!

Peanut Butter Cookies
Adapted from the Country Baker: Cookies & Crackers, Hearst Books, 1993.
1 cup firmly packed brown sugar
1 stick unsalted butter, softened
1/2 cup chunky peanut butter (Skippy all the way--the recipe even says DON'T use the "health-food variety" stuff.)
1 egg
1 tbsp vanilla extract
1 1/2 cup all purpose flour (bleached)
1 tsp baking powder
1/4 tsp salt (or a pinch)

Preheat oven to 375 degrees. Grease or use silpat mats on 2 baking sheets. In a large bowl, by hand or with electric mixer beat the sugar and butter until light and fluffy. Add peanut butter and continue beating until well-mixed. Beat in the egg and vanilla. Use a low speed and add in flour, baking powder and salt. At this point, if using an electric mixer, set aside and continue mixing batter by hand with a spatula--it's easier to scrape the sides of the bowl and make the dough form into a well-mixed ball. Add semi-sweet chocolate chips, if desired, and stir until they're mixed into batter.

Using two spoons, scoop heaping spoonfuls of dough (and scrape off) onto baking sheet and press down until flat, about 1/4" thick. Use the back of a fork to press gently onto the tops of the cookies, creating a criss cross pattern. Bake cookies for 10 to 13 minutes, until slightly golden (if you prefer softer cookies) or dark gold (for crispier cookies). Allow to cool on wire rack. Then stuff your face silly or give away to colleagues or friends before you let things spiral out of control.

Thursday, March 27, 2008

Date Cake

Chopped dates are so cute. But so painful for the chopping hand.

Got your attention, didn't I?! However, the date in question is none other than the dried fruit, so sweet one might mistake it for candy. I was inspired not by lutefisk tonight (thanks to Tiffany for the suggestion), but by the sultry sugar and spice of the Middle Eastern Passover traditions (though Passover is still a few weeks away. Not at Safeway, where a large front of store display offers goodies from Streit's and Manishewitz "on sale."). Now that I've made a recipe that calls for "finely chopped dates" I have to ask the recipe's creator--are you NUTS? Chopping those dates--and I took great pains just to get them coarsely chopped (forget "finely")--is probably going to account for my early onset arthritis.

Tonight's recipe hails from the April 2008 edition of Gourmet. I made a mistake in the production of this cake, adding the egg yolks to the nut mixture instead of the egg whites, as specified in the recipe. I don't know how this happened, yet miraculously the cake turned out fine. Mine was a bit on the moist side, due in part to my use of too much date-soaked water. Oh well--what's done is done. Now it's time to eat cake!

Walnut-Date Torte, mostly word-for-word but slightly adapted from Gourmet
1/4 c boiling hot water
1 1/2 c pitted dates, finely chopped
1 1/2 c walnuts, toasted and cooled
3/4 c sugar
2/3 c matzoh meal (or Passover cake flour)
zest of 1 orange
1/2 tsp cardamom
1/4 tsp salt
4 large eggs, separated, at room temp 30 minutes

**Note! I see one thing that I did wrong. I completely ignored the direction for 1/4 c hot water. Instead, I added enough--more than 1/4 cup--to cover the dates. Proof that I really should read every word in a recipe.

Preheat oven to 350 degrees with rack in the middle. Spray or grease a 9" round cake pan. Pour hot water over dates and let stand 15 minutes to soften. In a food processor, grind up toasted walnuts and add 1/4 cup sugar until the mixture turns powdery. Add zest, cardamom and salt and pulse until blended. In a separate bowl, beat the egg whites until they form stiff peaks. Then add the remaining sugar and continue beating until they form glossy stiff peaks. Add the egg yolks to dates and whisk until mixed. Fold the egg-date mixture into the egg whites. Finally, add the nut mixture to the egg batter and fold in until well mixed. Pour into cake pan and bake for 30-40 minutes, until golden brown and cake springs from pan sides.


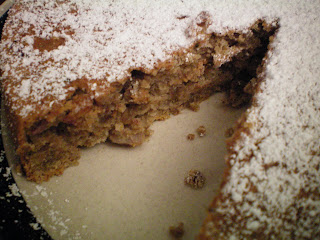
A reddish-brown tint from the date pieces peeks out at the eater.

The Gourmet recipe says to make a confectioner's sugar-potato starch mix to top the cake, but I just used the sugar. It is a very sweet cake, so no sugar topping is needed; it's really only there for presentation. Do you like it?

Wednesday, March 26, 2008

Grape Jelly-Chili Meatballs


My mom and I discuss this odd dish frequently. This is one of the few all-American (kind of) meals she makes--with a twist. The meatballs (which have morphed from being made with ground beef to ground turkey over the years,) are then served with pasta--preferably bow-tie/butterfly shapes (farfalle)--and covered in a delicious stovetop brew of grape jelly and chili sauce. EWW, right? Wrong--these are so good. As soon as I get the recipe from my mom, I'll post.

And now, a challenge. Readers, I've been lacking inspiration in the kitchen as of late. (As you guessed by my infrequent posting.) I haven't made anything new and exciting, instead running through the usual kitchen staples: chili, stir fries, pasta. It's just a passing phase, and I'll be back to trying new recipes, but I'd love to know if you have a food challenge for me in the meantime. Ideas?


Sunday, March 16, 2008

Shower recap


Last week my friend Stephanie and I hosted a bridal shower for our friend Galit. I thought that the fruit arrangement stylings of Steph should be displayed here. I can't help from reviewing this photo over and over. Steph, you made the fruit look so beautiful!! Following that is a picture of the apple tart that I made with some help from my mom. It looked beautiful, but the crust came out too hard for my liking. I had to shuttle it away from the table and cut it into slices hidden from view, for fear of tart flying off the plate, or worse yet, breaking Stephanie's cake plate. The filling was practically all apples: the filling sauteed apples with a small amount of sugar, and the topping raw apple slices. (The theme of the shower being a "tea," fruit and fruit tarts came to mind as being appropriate!)


As it turned out, the most rewarding part of the whole event wasn't the amount of sugar involved, but seeing the bride-to-be so happy with our work.


Tuesday, March 11, 2008

Violet Crumble


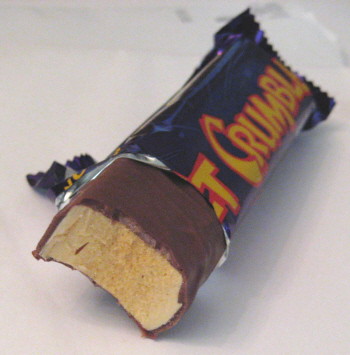
I was suckered by the charms of Curtis Stone on an episode of Take Home Chef and went out to buy an Australian sweet manufactured by Nestle as a result: the Violet Crumble. Curtis used this candy bar as a topping on cheesecake to try and connect with the palate of the 30-something Aussie lass he found in an L.A. area Whole Foods. All this talk of Violet Crumble and cheesecake made me hungry for something--I just wasn't sure it was the combination of the two. (This is what I love about Nestle: though the coporation is openly hated here in the US--but quietly loved for it's Kit Kats and Hot Cocoa with Marshmallows--they really do bring a better quality milk chocolate to the entire world, with different products in every chocoholic country. Sure, some partially hydrogenated fats and lots of refined white sugars may be involved, but the product beats out Hershey's any day for taste.) Well, the Nestle product destined for Australian audiences turns out to be not bad at all--in fact, it's quite good! The golden interior (as seen above, in the photo by "Rosa,") actually tastes a bit like desiccated toasted marshmallows. One could say it's like a pre-packaged s'more, sans graham cracker.

Speaking of graham crackers, while I liked the Violet Crumble, I wouldn't think of adding it to something as rich and simple as cheesecake. Better to let the creamy sweetness of the cheese come through on its own. While I admire Curtis on some levels--one being that he's a hot Aussie--I'm not always so sure of his baking improvisation skills.

Sunday, March 2, 2008

Lots o spaghetti, oh!

A week has flown by without much posting. What can I say--will you forgive me? Still, I have been eating, as usual. Weird aches and pains ail me, but nothing stops me from loving food. It's a sickness.

At any rate, in the past few days I've been mixing it up with spaghetti. What is "it"? Turkey meat sauce, broccoli, chicken sausage, cheese. Uhmm-mmm. Only the tastiest of salty treats for my spaghetti (excluding one favorite--prosciutto).

Thursday I took in a spaghetti crust pie, a delicious dish from my childhood, made straight from Better Homes and Gardens Step-by-Step Kids' Cookbook. And tonight I made spaghetti with meat sauce (ground turkey), only the turkey didn't look "normal;" it seemed almost fluid, liquidy, and didn't break up into big chunks, and almost smoothed out entirely into the tomato sauce. WEIRD. Still, it's hard to go wrong with garlic, tomatoes and meat. At least it all tasted good!


Spaghetti Crust Pie
6-8 oz spaghetti
2 tbsp butter
2 eggs, whisked
1/3 c parmesan cheese
salt
pepper
tomato sauce (your own/store bought)
cheddar cheese
additional toppings of your choosing

Cook and drain pasta. Preheat oven to 350 degrees. In a medium bowl, combine pasta, butter, eggs and cheese. Stir until well mixed. Pour into a buttered 9 or 10" pie pan and press gently into sides so that it forms a pie "crust." Pour sauce and toppings on top (except cheese) and bake in oven for 20 minutes. Then add cheese and let cook for 5-10 minutes more, until it starts to bubble, but not burn. Let cool 10 minutes, then serve. Enjoy!

Sunday, February 24, 2008

Tarta de Naranjas


Perhaps one of the prettiest tarts I've ever made, Anya von Bremzen's Tarta de Naranjas came out just as expected. Beautiful to look at and tasty to eat. The pastry crust is composed mostly of butter, confectioner's sugar, one egg and a little bit of heavy whipping cream. The recipe made more than needed for a 9-inch tart pan, but it came out just right: sturdy and crispy, sweet and buttery. Preparing the oranges was a serious labor of love, requiring light simmering of the slices for about 15 minutes, in an OJ-orange zest-sugar preparation over the stove. Then the slices must be cooled, and finally pat dry and halved. Once the tart shell had been baked, I added marmalade to the bottom of the pastry, and topped with the orange slices, then put in the oven to bake the oranges. (I had to cover the edges of crust with aluminum foil the entire time, to be sure they wouldn't burn.) The bits of white that you see above are the areas of granulated sugar that did not fully caramelize (the darkened parts prove where the sugar did caramelize).

Again, I cannot plug too frequently The New Spanish Table. Von Bremzen gives excellent descriptions and how-to of the recipes, and they're clearly well-researched, as everything I've made has come out just as expected. Choosing what to make next from it is perhaps the only difficult thing about the book. . . .

Saturday, February 23, 2008

Panino


Today for lunch I procured a baguette, prosciutto crudo, and fresh mozzarella (only a step off from the burrata that is creamily good). I split the baguette open, slathered on some olive tapenade and added the goodies above, along with a few tomato slices, to create a nice hearty sandwich (panino), reminscent of Italy's finest. It's not quite the same as eating a sandwich in Italy, but almost as good....

Thursday, February 21, 2008

Take Home Nanny

Ok, here's a blog-extra for you. Though I'm no "Millionaire Matchmaker," I am so obsessed with reality TV that this week's Supernanny sparked the idea for a great celebrity match. Supernanny's Jo Frost with Take Home Chef's Curtis Stone! They're both attractive people with lovely accents, and I'm sure that Mr. Stone would find more of a challenge in the confident and headstrong Ms. Frost than in the dozens of L.A. wannabe actresses who swoon and thrown themselves at Curtis in Whole Foods to take them home with him. Just an idea for these two that love may be a tv show away....

Supernanny photo credit: The Sun